• Home
  • About
  • Blog
  • Categories
  • Terms and Conditions
  • Media & Press

Smallish Home

Design•DIY

DIY Floating Shelf Above a Washing Machine

December 23, 2022

Top loaders are tricky when it comes to storage, but adding a floating shelf just above can help you gain additional storage space and help hide the not so pretty parts that come with washing machines.  This shelf uses minimal cuts and is an easy DIY that even beginners can tackle!

Top 3 tools that will make this project a snap!

Ryobi Sliding Miter Saw

Ryobi Impact Driver

Ryobi Cordless Brad Nailer

While I’ve always been a bit jealous of the counter space that comes with top loaders, I don’t love dealing with drums and the smells that come with them.  That’s why I’ve been a top loader convert for the last few years.  #speenqueenforlife

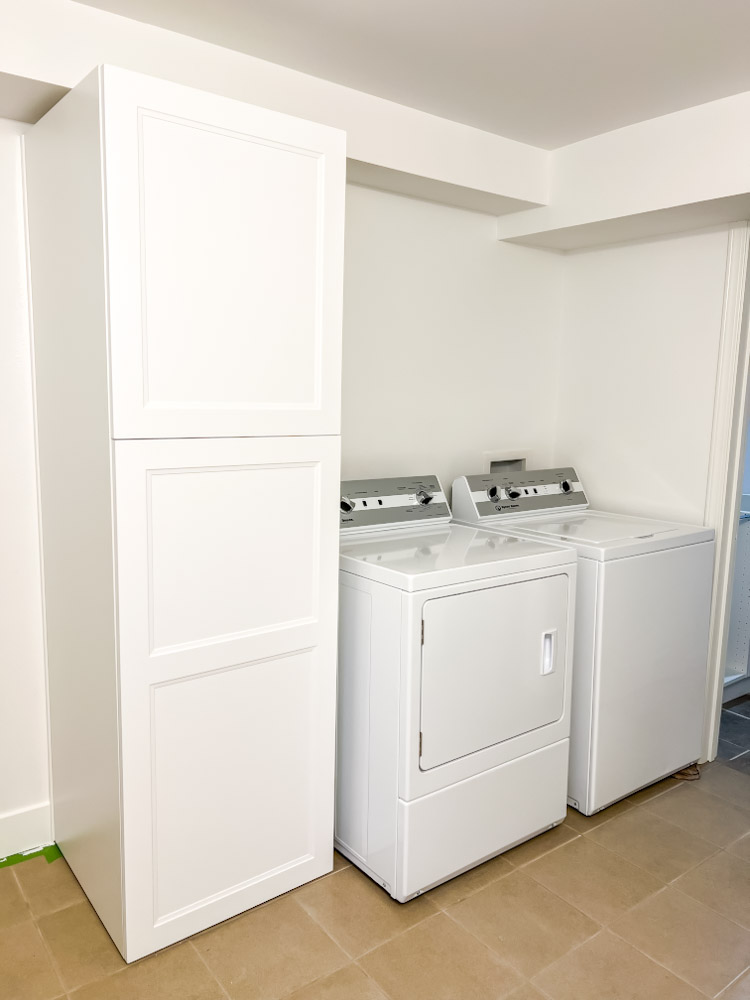
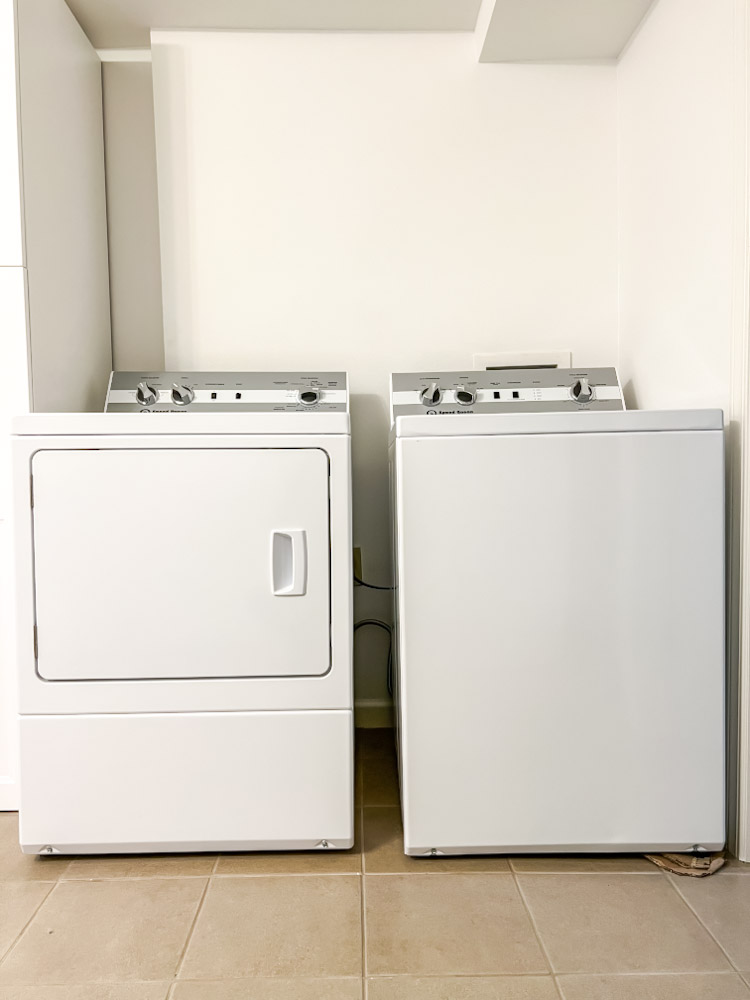
And while hanging cabinets above a washer and dryer can be a great way to add storage, our odd shaped ceiling prevented us from being able to hang anything and have it look halfway normal. 

I needed to find another way to add storage and use that wall space above our washer and dryer. 

That’s where the floating shelf comes in.  I wanted to make something custom that 1) fit the space 2) was narrow enough to still open and close the top loader lid and 3) was a place I could store & display laundry soap.  Because really, it’s the little things in life.

After lots of research and combining a few ideas from across the web, here’s what I came up with:

Shelf above washer and dryer

Eek! I love it so much! 

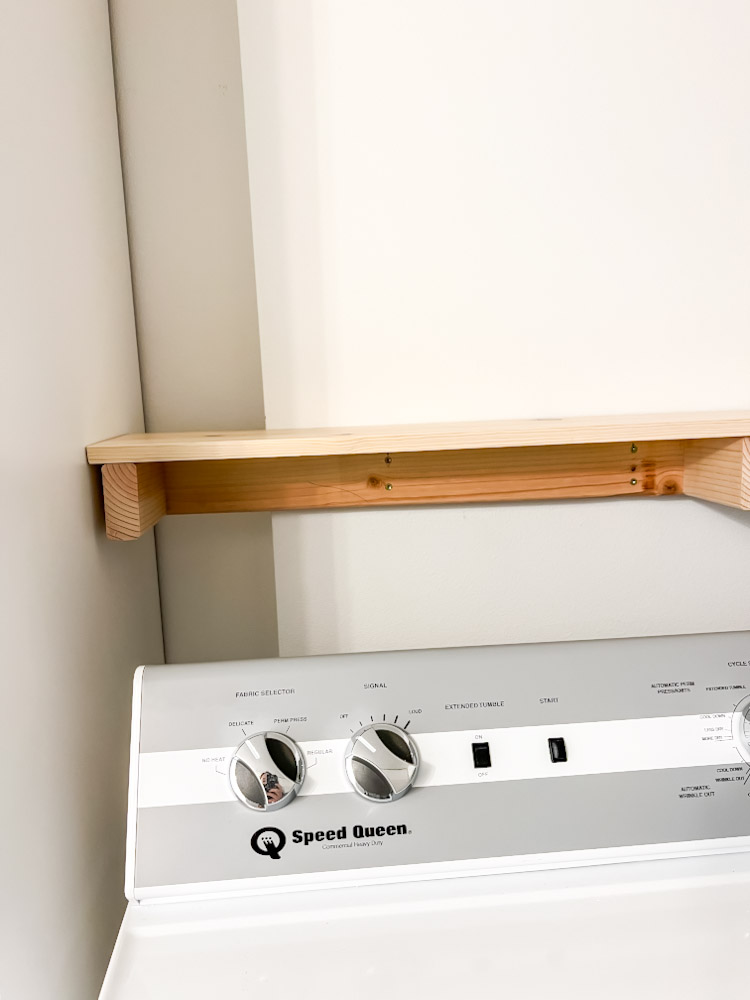
Now, one thing to note is that this shelf does not have a bottom, meaning the space inside the shelf is “open”.  However, having this space free means more room for your hands to reach in under and adjust the hookups that are conveniently hidden in the shadow of the shelf.

If you are looking for an easy-to-build shelf for above your washer and dryer, then read on for the step by step guide.

DIY FLOATING SHELF FOR A TOP LOADER WASHING MACHINE

Supplies Needed:

2×4 for internal support structure

1×8 pine board (select one that has few knots- this will be the top of your shelf)

1×6 pine board (again, look for one that has a nice grain pattern – this will be the front of your board and what you see when you look at the shelf)

3 1/2 inch wood screws

Stud finder

Drill

Impact driver

Miter saw or circular saw

Brad Nailer

Instructions:

Step 1: Measure and mark your space

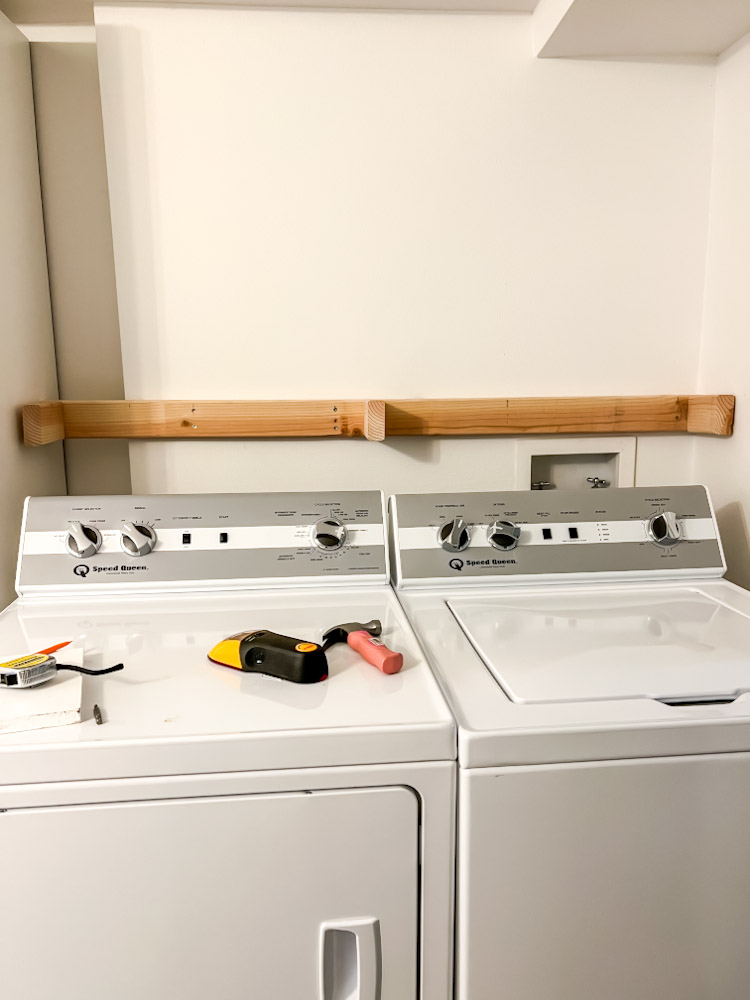
Measure the space above the washing machine to determine the exact length of the shelf.  Use a stud finder to find and mark all studs.  I like to use a stud finder that identifies metal and electrical behind walls.  This can help prevent you from drilling into something you REALLY don’t want to drill into.  

Decide how high you would like to hang the shelf.  I decided to hang my 2×4 just above the water hookups.  This was the perfect height to cover the eyesore that is the space behind the washer and still allowed access to the water.

Laundry room with tall cabinet

Step 2: Cut your boards

Use a miter saw or circular saw to cut your boards.  You will need to cut your 2×4 support board, the shelf board and the front board all to the length of your desired shelf. My shelf was 61″ so all three were cut the same length.

 Next, cut 3 support boards from the remaining wood on the 2×4.  These will be the arms in the “E” you will create.  The shelf board will sit directly on top of the “E” so the support boards plus the width of the 2×4 will need to be exactly the same as the width of your shelf board (in this case, I’m using a 1×8, so my width was about 7.5″ but make sure you measure for your specific board.)

Support structure for floating shelf

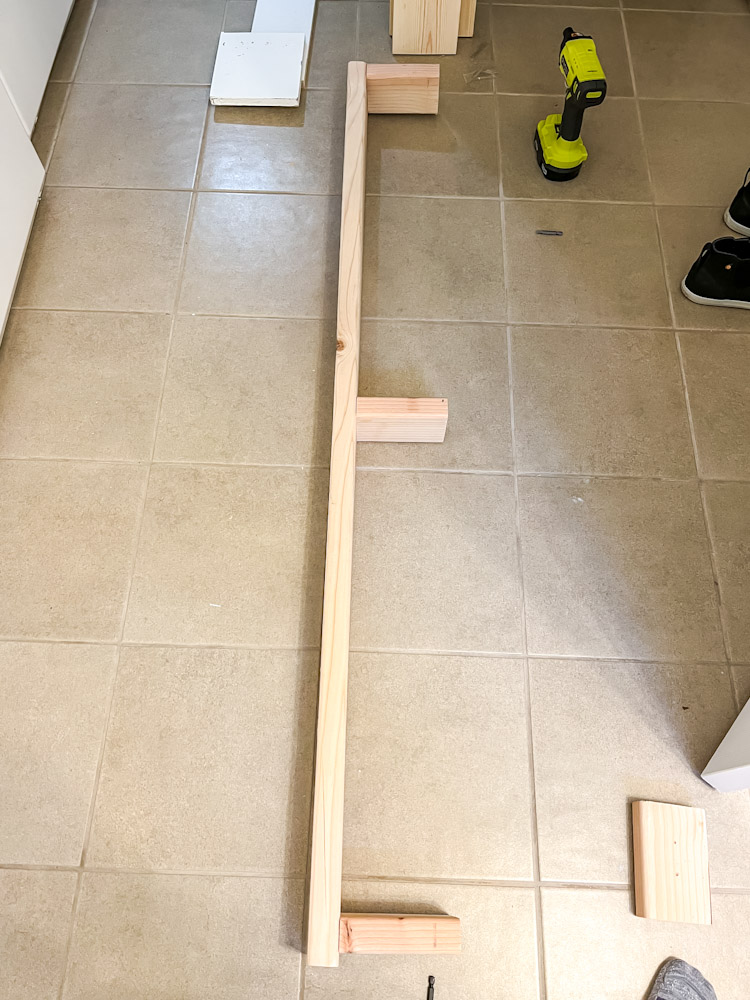
Step 3: Build the internal structure and attach to the wall

Now that you have the parts to make your “E” you will use 3.5″ wood screws to attach the support arm to the 2×4.  I pre-drilled holes from the 2×4 into the support arm and then used my impact driver to screw a 3.5″ wood screw into the support arm.  I made sure to space my support arms so that they would not be covering a stud when attached to the wall.

After I had my “E” created, I placed it on the wall and made sure it was level.  The floor in our laundry room is definitely NOT level, so I made sure the shelf was.  Then, I used 3.5″ wood screws and my impact driver to screw through the back of the “E” and directly into the studs.  I did two screws per stud and made sure I hit 3 studs. I can tell you this feels incredibly sturdy and it’s definitely not going anywhere!

2x4 support structure for floating shelf

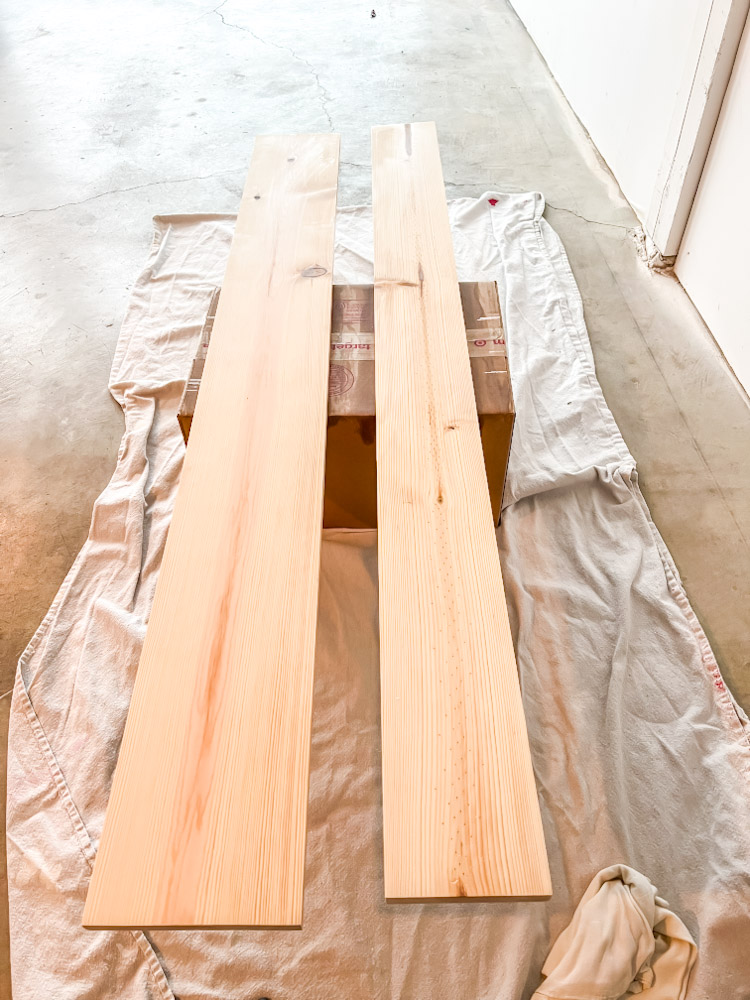
Step 4: Stain the shelf and front board

I sanded each board first with 150 grit and then 220 grit paper.  Then I applied pre-stain conditioner to all sides.  For the stain, I really wanted something light, but I also wanted to tone down some of the yellow undertones in the pine, so I decided to go with Varathane White Wash stain.  It looks beautiful in person and really shows off the wood.  Cross your fingers that it doesn’t yellow over time!

For a top coat, I did 2 coats of Polycrylic in satin to make sure the shelves were protected and wipeable.

whitewash stain on pine boards

Step 5: Attach the top board and front board

Now for the fun part!  Simply place the shelf board on top of your “E” and make sure it is lined up with the front of your support boards.  Use a brad nailer to attach the shelf to the support arm.  I did two nails into each support arm to make sure it didn’t move.

For the front, I placed the 1×6 board in front of the support structure and made sure the top was flush with the shelf.  Again, I used the brad nailer to place two nails into each support arm. I also added two nails that went from the front of the shelf into the top shelf board.

top board for floating shelf

And that’s it! Pretty great, right?  I really like how the chunky shelf balances out the tall white Ikea cabinet on the left side of the dryer. 

Before

speed queen washing machine

After

DIY floating shelf above top loader

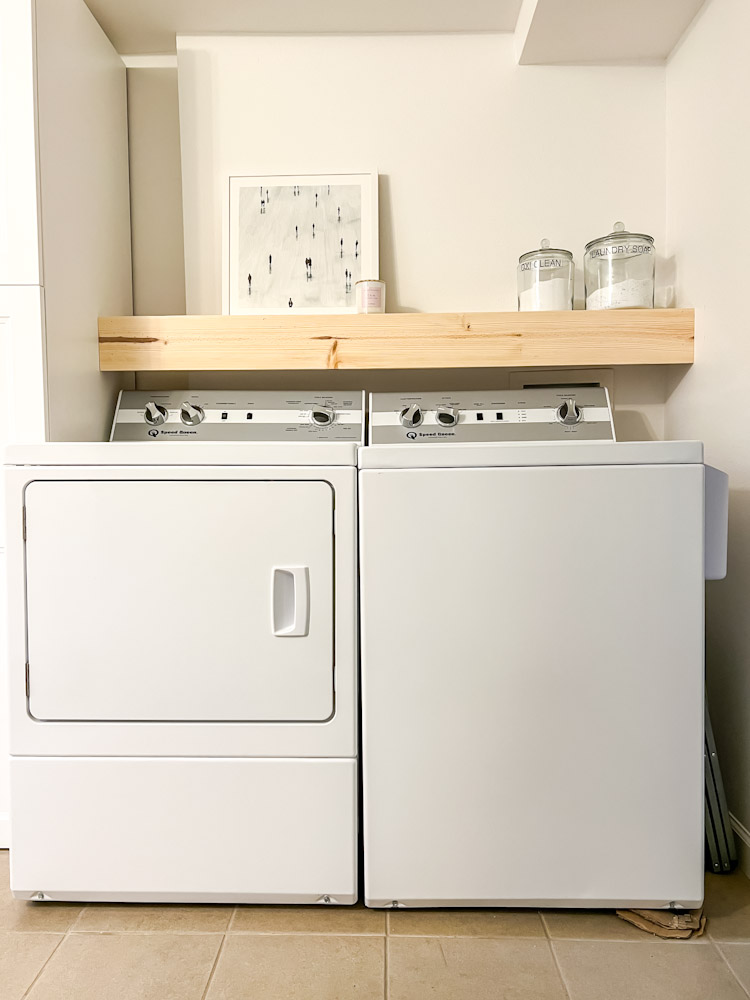
I’m so glad I decided to DIY this shelf.  It is so much sturdier than anything I could have bought and it is the perfect perch for our glass laundry soap containers.  

Our laundry room refresh is really shaping up and I’m loving how its coming together!  Not only are we making the space more functional for our family but we are adding a ton of storage!  I’ll be sharing some more updates and DIYs over the next few weeks so be sure to follow along on the blog and on Instagram!


0
0 Leave a Comment

basement before and after diy laundry room laundry room organization small space

Previous Christmas Home Tour 2022
Next DIY Mudroom Coat Hook Accent Wall

Related Posts

Small Laundry Room and Mudroom Reveal!

A Black and White Halloween

AN ORGANIZED TODDLER CLOSET

Reader Interactions

Leave a Comment Cancel reply

Your email address will not be published. Required fields are marked *

Primary Sidebar

About

About

Hi! I’m Lisa and I dig smallish homes. I believe they bring families together and provide a constraint on the accumulation of stuff. I’m obsessed with rethinking room design and storage solutions in order to live the life I want in the house I have. I hope you stay a while!
read more

Editor’s Picks

  • Organization

    Laundry Room Reveal Part 2: Organiz...

JOIN THE NEWSLETTER

Categories

  • Cleaning
  • Decluttering
  • Design
  • DIY
  • Lifestyle
  • Organization
  • Shopping

Instagram

Have little boys who love Nerf blasters? Here are Have little boys who love Nerf blasters? Here are 3 ways to organize and store them so you don’t have to look at them all the time. My personal favorite is the extra large basket! #nerfblasters #toyorganization #toyorganizationhacks #playroomorganization
An easy DIY floating shelf for above a top loading An easy DIY floating shelf for above a top loading washer and dryer. It’s the perfect way to add storage while still allowing access to the water hookups & the washer door. All the details and instructions are on the blog - click the link in profile to read! #diyfloatingshelf #laundryroom #laundryroomideas
It’s January which means it’s the best time of It’s January which means it’s the best time of year to buy Christmas storage bins! Shopping in store often offers the best selection (look at big box stores!) But if online shopping is more your speed I’ve rounded up my favorite bins that are available for shipping. Click the link in my bio to read the post and shop my favorites! #christmasorganization #christmasstorage
Our Christmas playroom is finished and ready for S Our Christmas playroom is finished and ready for Santa! Only 2 sleeps to go!  #christmasplayroom #christmasready #christmasbooks #builtinshelves

Disclaimer

© Smallish Home, 2020. Unauthorized use and/or duplication of this material without express and written permission from this site’s author and/or owner is strictly prohibited. Excerpts and links may be used, provided that full and clear credit is given to Smallish Home with appropriate and specific direction to the original content.

Amazon Associates Disclosure

Smallish Home is a participant in the Amazon Services LLC Associates Program, an affiliate advertising program designed to provide a means for sites to earn advertising fees by advertising and linking to amazon.com

Archives

  • February 2023
  • January 2023
  • December 2022
  • November 2022
  • October 2022
  • September 2022
  • August 2022
  • July 2022
  • June 2022
  • April 2022
  • March 2022
  • February 2022
  • December 2021
  • November 2021
  • October 2021
  • September 2021
  • July 2021
  • June 2021
  • May 2021
  • April 2021
  • March 2021
  • February 2021
  • January 2021
  • December 2020
  • November 2020
  • October 2020
  • September 2020
  • August 2020
  • June 2020
Have little boys who love Nerf blasters? Here are Have little boys who love Nerf blasters? Here are 3 ways to organize and store them so you don’t have to look at them all the time. My personal favorite is the extra large basket! #nerfblasters #toyorganization #toyorganizationhacks #playroomorganization
An easy DIY floating shelf for above a top loading An easy DIY floating shelf for above a top loading washer and dryer. It’s the perfect way to add storage while still allowing access to the water hookups & the washer door. All the details and instructions are on the blog - click the link in profile to read! #diyfloatingshelf #laundryroom #laundryroomideas
It’s January which means it’s the best time of It’s January which means it’s the best time of year to buy Christmas storage bins! Shopping in store often offers the best selection (look at big box stores!) But if online shopping is more your speed I’ve rounded up my favorite bins that are available for shipping. Click the link in my bio to read the post and shop my favorites! #christmasorganization #christmasstorage
Our Christmas playroom is finished and ready for S Our Christmas playroom is finished and ready for Santa! Only 2 sleeps to go!  #christmasplayroom #christmasready #christmasbooks #builtinshelves
Is there anything better than hot cocoa when it’ Is there anything better than hot cocoa when it’s snowing?  Let’s just say we’ve gotten a lot of use out of our hot cocoa bar this year.  #hotchocolatebar #christmasdecoration
Decorate for Halloween with me! Plus catch a sneak Decorate for Halloween with me! Plus catch a sneak peak of my new wall shelves - I got them up just in time to display my favorite holiday decor! 😀#halloweendecor #livingroomdecor #shelfstyling
Hey! Hi again. Summer is officially over around he Hey! Hi again. Summer is officially over around here and although it was fabulous I’m actually thrilled to get back to working on some new projects. We are coming up on one year in our new house and I’ve got some big plans in the works to add storage and make our spaces more functional. Hope you will follow along as I share my progress both on the blog and here on Instagram!  Click the link in my bio to read the blog at smallishhome.com. ❤️

ConvertKit Form

Copyright © 2023 Smallish Home · Theme by SheShoppes