Organizing a deep pantry may seem like a daunting task, but with some helpful tips and the right products, you are guaranteed to end up with a functional and aesthetically pleasing pantry where nothing gets lost!
Here’s what I used organize my deep pantry:
Large wooden all purpose bins
Clear plastic canister set
Clear plastic rectangular canisters
Clear shelf riser
Woven baskets
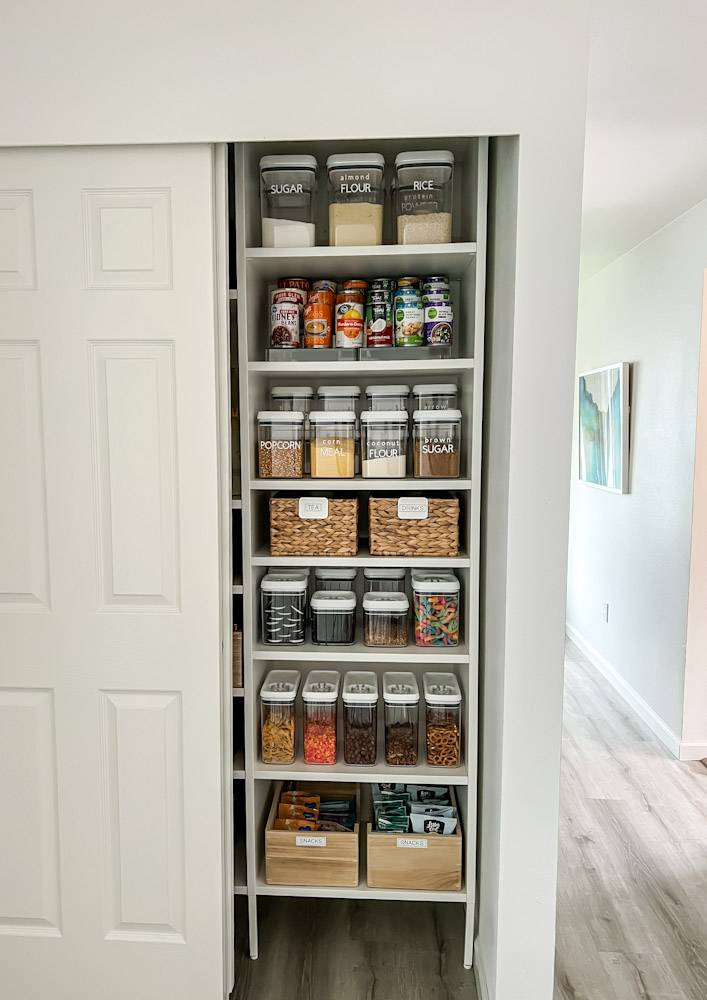
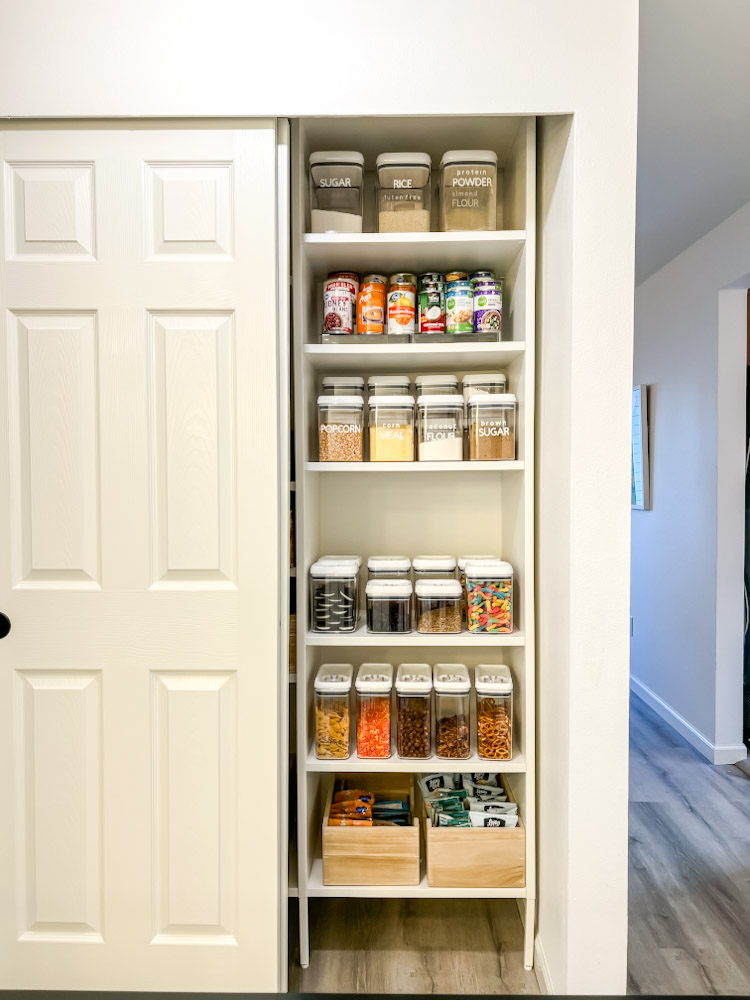
It’s pantry reveal day! I’m so excited to share how I recently re-organized our deep pantry closet to simplify and streamline our food to make it more functional for our family of 4.
After a few trips home from the grocery store where I felt like I had no where to put things, and yet, my pantry was overflowing with food. I realized we needed to find a way to simplify our shopping and simplify our pantry.
We had too many types of foods, too many half used containers, too many things we forgot about!
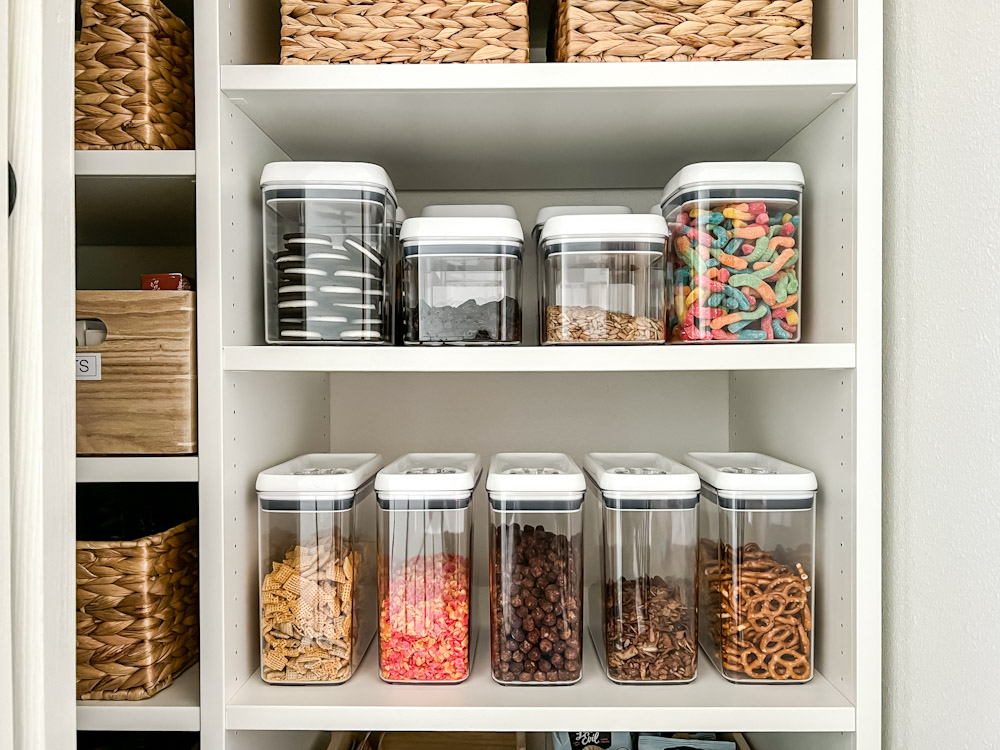
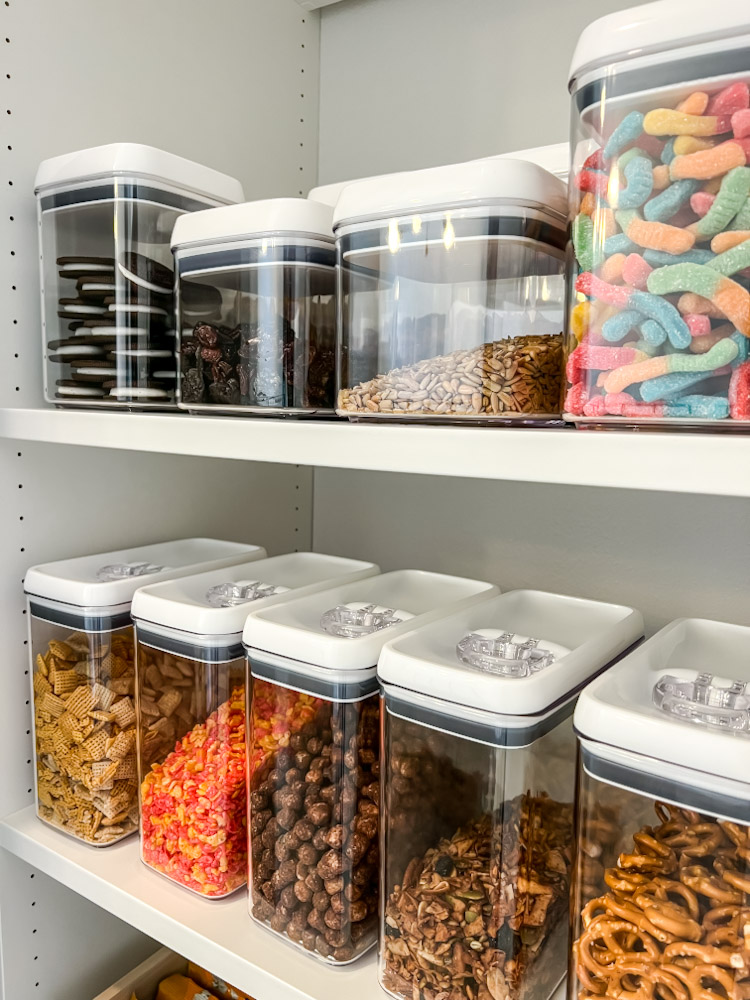
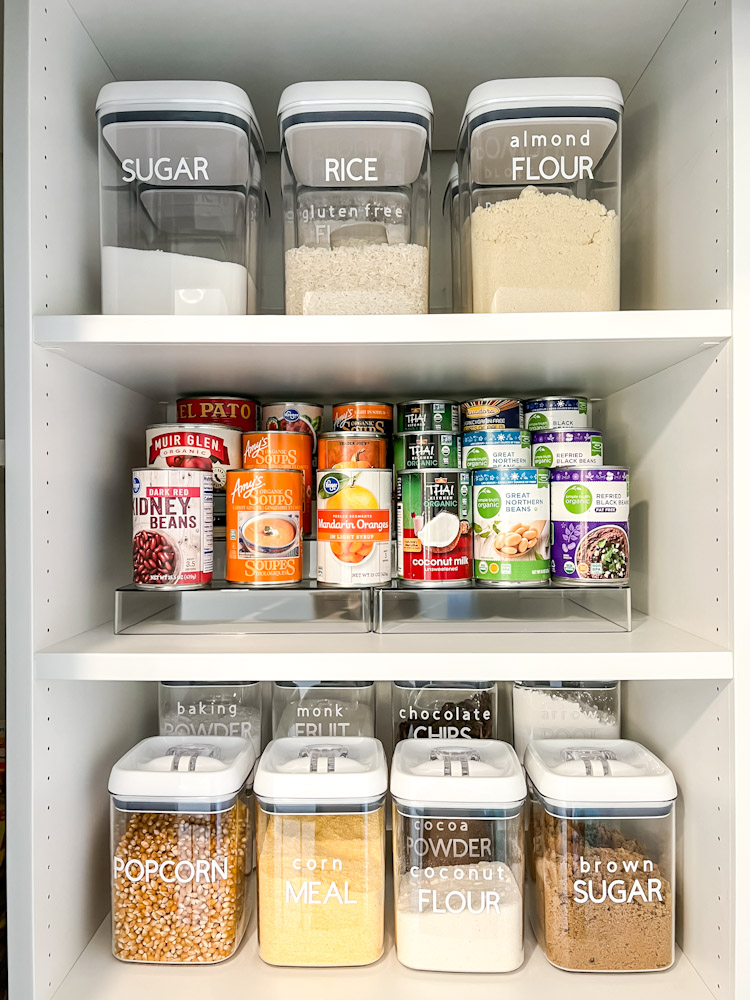
It was time to bring more visibility to our pantry. I wanted to see exactly what we had AND limit the number of items we stored in our pantry. To do this I decided it was time to decant as much as possible into clear canisters. Basically, all bulk snacks, nuts, cookies, baking ingredients and cereals were transferred into clear containers.
Is that a lot of containers? Yes, yes it is.
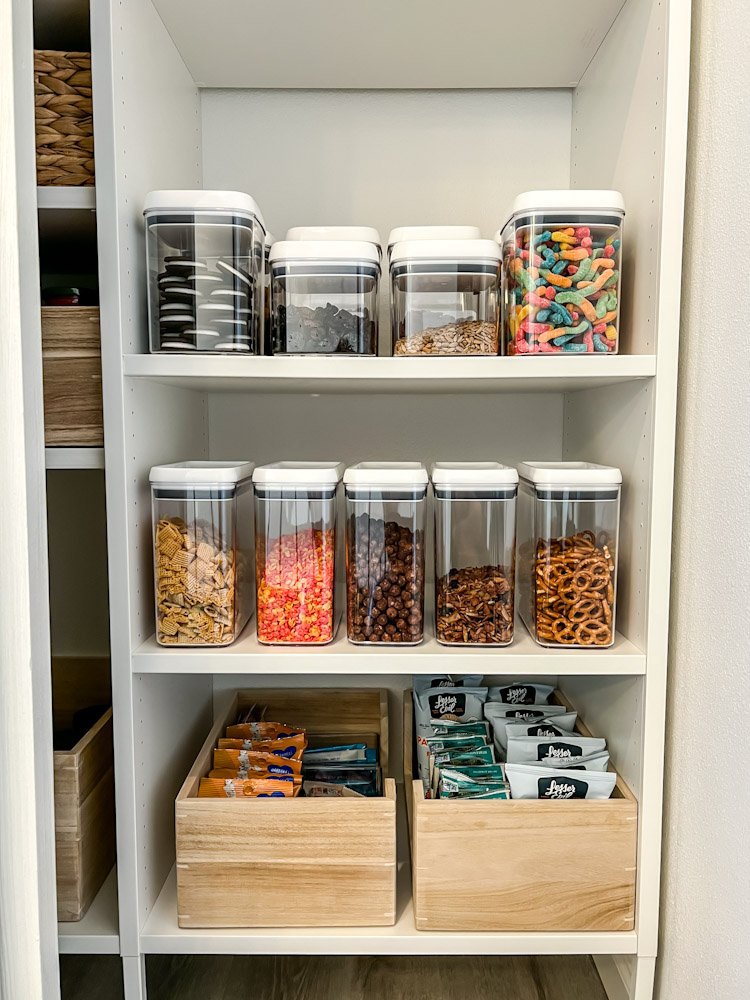
After measuring our deep shelves and mocking up a few designs, I realized I could fit 2-3 rows of clear containers on my deep shelves. By stacking two small containers behind and placing a row of medium containers in front, everything is visible. And while I do have to shuffle containers to get to items in the back, it really isn’t too much of a hassle.
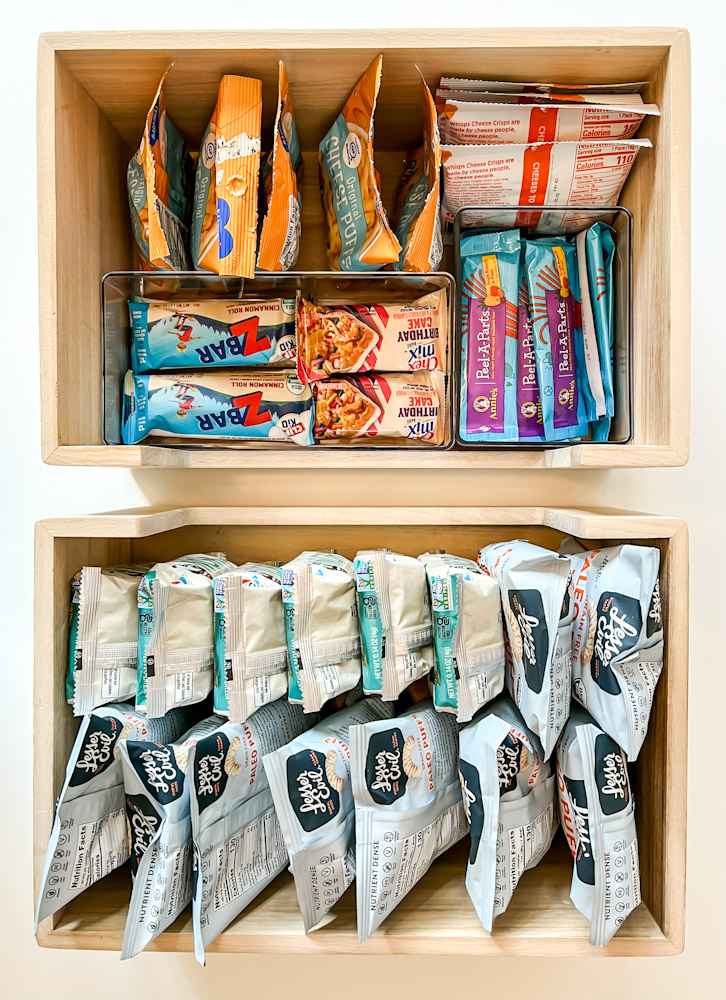
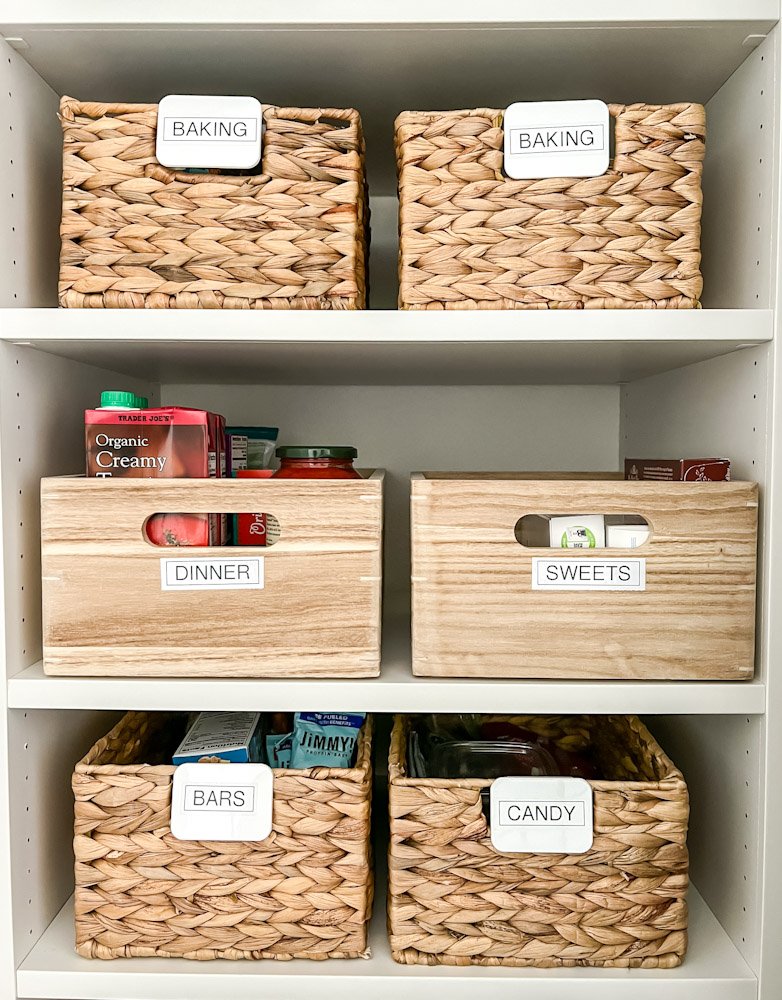
I also decided to reuse my wood bins and woven baskets for everything else that wasn’t being decanted. I love using these bins for items where we use the whole item at one time – like single serving packaged snacks, pasta sauce, and macaroni and cheese.
And of course I had to include my favorite organizer for cans – risers! This time I upgraded to clear acrylic risers that match the clear canisters.
I honestly love how it turned out!
Here are 10 tips to help you organize any deep pantry:
Tip #1: Add as many shelves as you can
It’s kind of amazing, but adding more shelves instantly gives you more surface area to store things. When you place shelves closer together you can squeeze more storage into your existing pantry. This is especially helpful in deep pantries where the back is often hard to reach. With more shelves, you can utilize just the front of the shelf and leave the back open without sacrificing storage.
If you have adjustable shelves in your pantry, look to see how they are attached and if you could add more. Sometimes this is as simple as having Home Depot cut boards to fit your pantry dimensions or in our case, purchasing additional shelves from IKEA.
Here, you can see how I had a little bit of extra vertical space in the middle of my pantry. I purchased another IKEA Aurdal shelf and instantly added space for two more baskets.
Before:
After:

If you can add shelves and still maintain good spacing between shelves then go nuts! Add as many as you can. You won’t regret it.
Tip #2: Measure, measure, measure
With any organization project, this is the number one thing you must do. Measure the width, depth and height of each shelf and write it down in a notebook or on a piece of paper.
This makes it so much easier to shop for bins and baskets because you can instantly eliminate items that are too short (like all those great 12″ bins you will likely find) and help you narrow it down to only the deep bins that are in the 14-16″ range.
And bonus, by knowing the dimensions of your shelf you can quickly calculate how many bins will fit on your shelf before you head to the store or put in your online order.
Tip #3: Use bins that fit the full depth
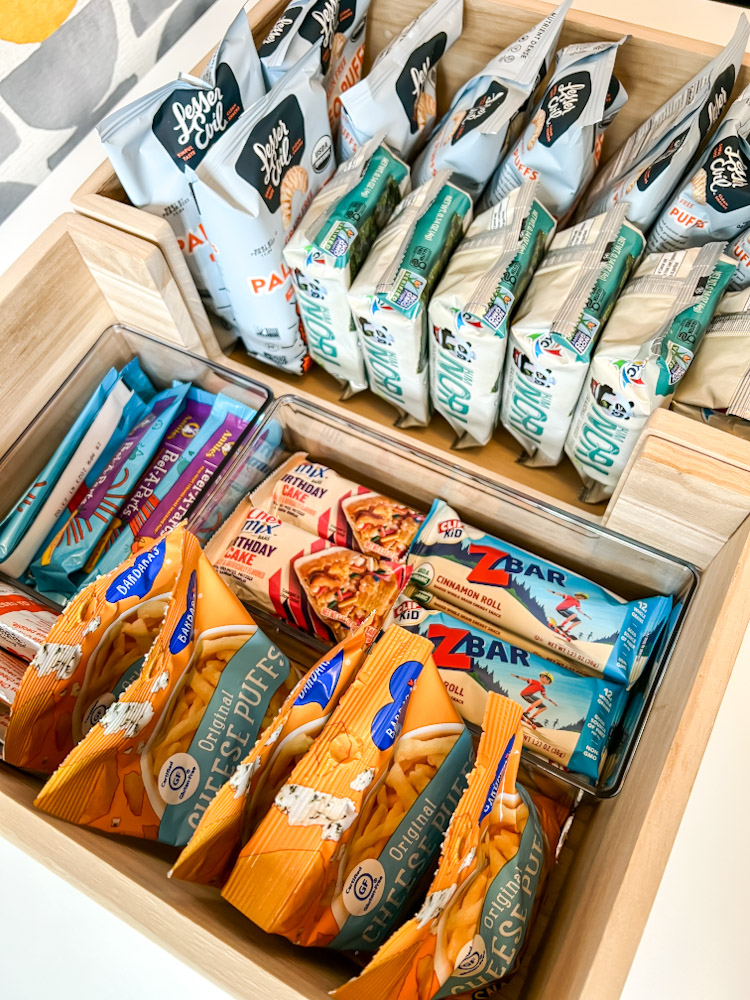
While this may seem self explanatory, but deep pantries need large bins. Once you know how deep your shelves are you can search for bins that will fill the shelf front to back. This gives you the maximum amount of storage for your space. Here are some of my favorite stores for shopping pantry bins of all sizes:
- The Container Store
- Target
- Walmart
My wood bins are The Home Edit line from The Container Store. They fit perfectly next to each other on the shelf and extend all the way to the back of the pantry. This means I’m able to maximize use of the full shelf without losing anything in the back.
Tip #4: Use can risers
Can risers look like stairs for your cans. They come in a range of colors, sizes and materials and some are even adjustable width-wise.
I absolutely love these in a pantry because you can see exactly what you have. Nothing can hide behind the other cans! This helps prevent overbuying and makes it easy to find ingredients when you are cooking. And if you really want to make your cans look fancy, arrange them in a rainbow order. I know this sounds like a lot of a work but it really only takes 5 minutes and I promise you there is some very real joy and satisfaction that comes from seeing color arranged cans.
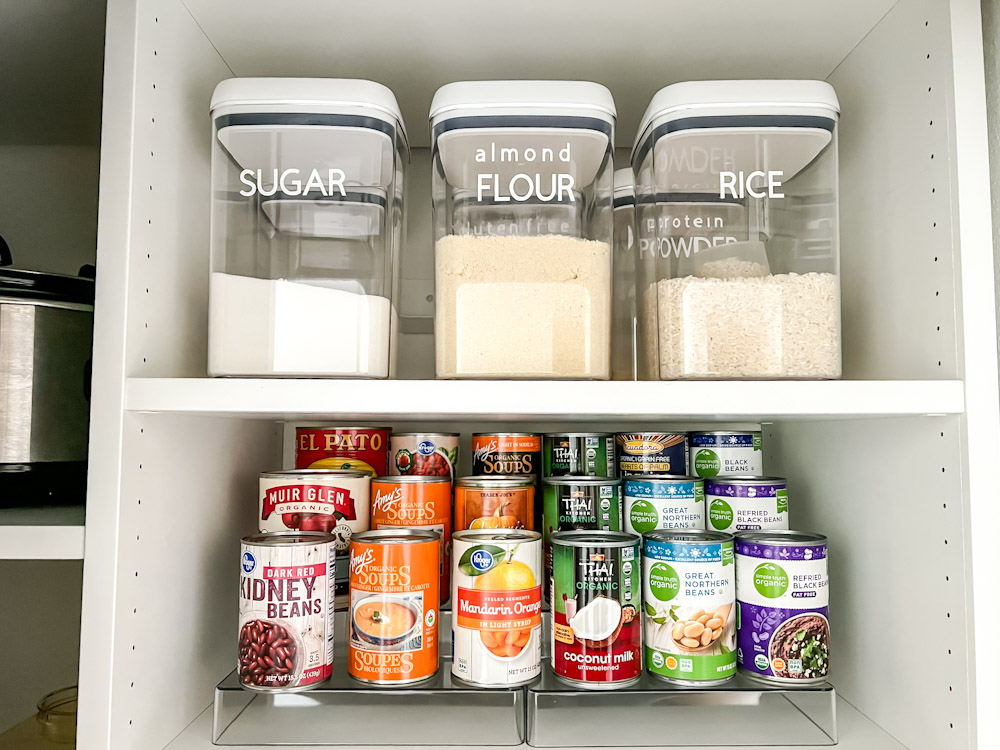
Pro tip – make sure you buy a can riser designed for standard cans, not spices! Many of the spice rack risers are too narrow for cans.
Tip #5: Stack or layer clear canisters in rows, 2-3 rows deep
In a small kitchen with very little pantry space, choose rectangular canister shapes over round. Not only will you have less wasted space, but you will often be able to fit more containers into your pantry. I like to look for containers that stack as well, so I can create rows at varying heights. This helps me “see” what is in each container.
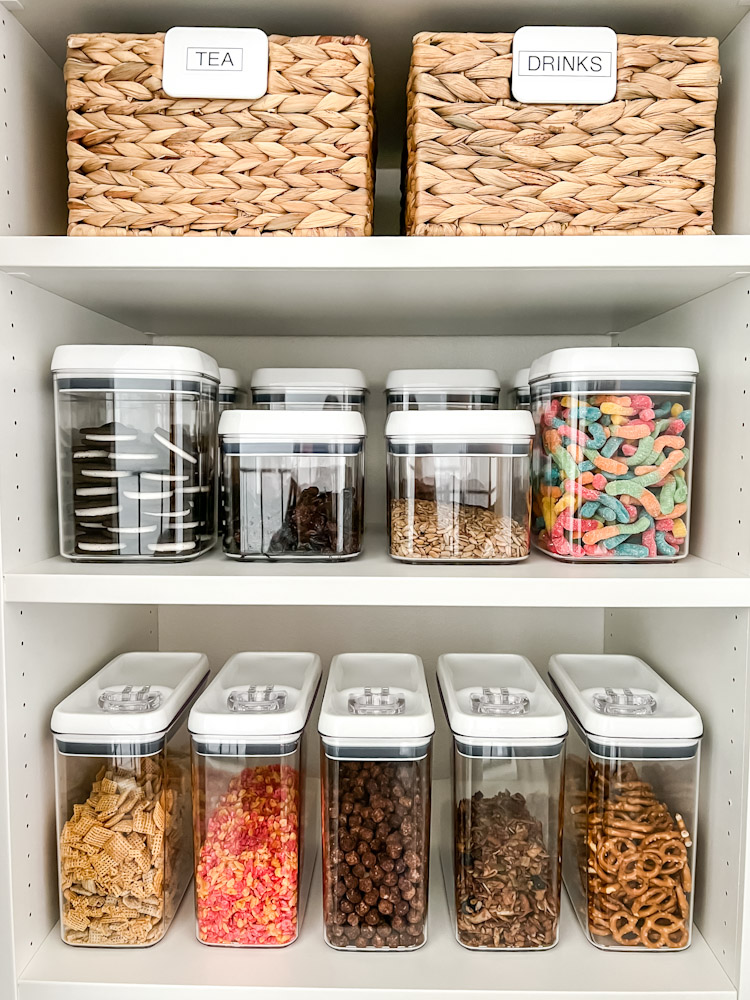
For a deep pantry shelf, these can be layered 2-3 rows deep. While you may need to shuffle items around to get to items in the back, I find that it isn’t too much trouble with these bins because they are lightweight and easy to take out.
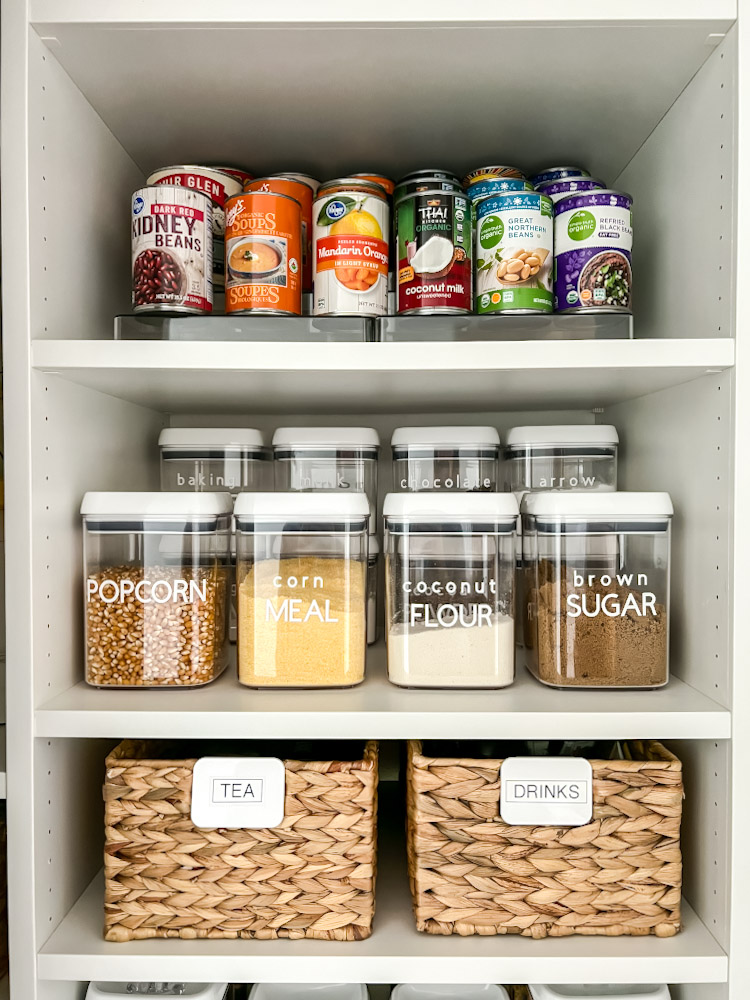
Looking for the best pantry containers? Here’s a roundup of my favorite dishwasher safe canisters and containers:
The Best Dishwasher Safe Pantry Containers
Tip #6: Store backstock behind the containers
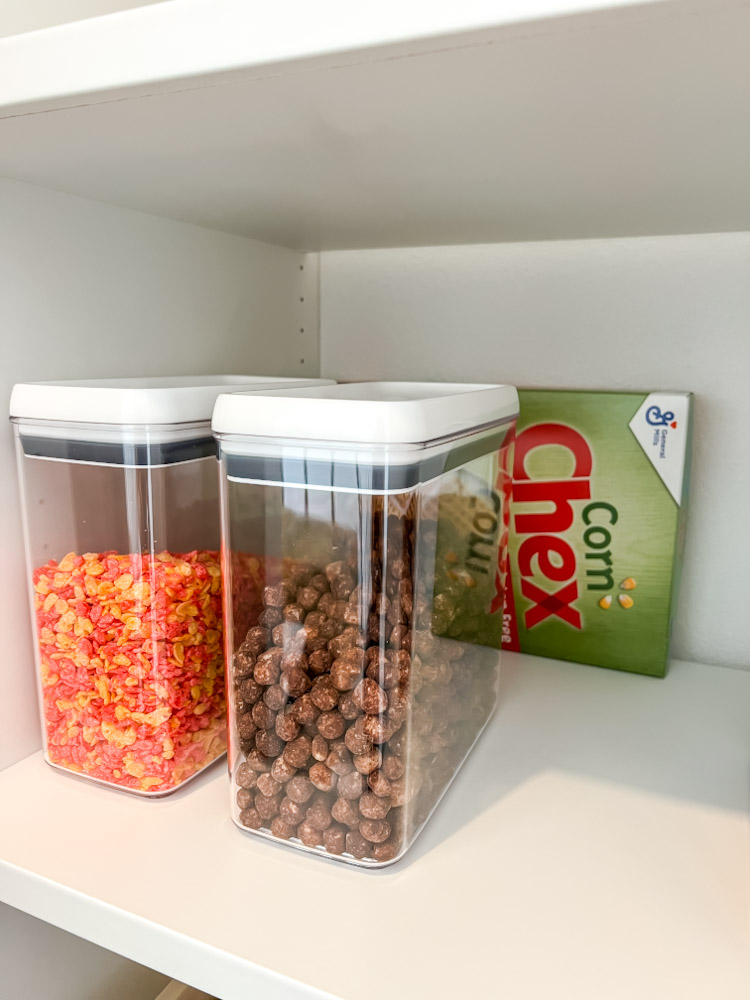
Backstock is generally the “extra” items you keep on hand. It can be an extra box or two of cereal, spaghetti noodles, crackers or whatever else you like to keep on hand so that you don’t run out. With a deep pantry, these items can be kept behind the current “in use” item.
For example, in my pantry I keep an extra box of cereal behind our current cereals. This minimizes the number of boxes that are opened (and thus going stale) at any point in time. It’s also super easy to see I still have backup cereal and a good reminder not to buy more at the store.
Tip #7: Use labels
For the love of all things orderly, don’t forget to finish your pantry masterpiece with some labels. This is often the only thing that will keep your family from placing things wherever they feel like or constantly asking you where things are.
For this project I used two types of labels: vinyl labels made with my Cricut Joy for the clear pantry containers and adhesive sticker labels using my Brother P-label maker for the bins and baskets.
The P-Touch label tape was perfect for all the bins and baskets because the tape could be stuck directly to the smooth wood boxes or to the white plastic bin clips. The tape is easily removable, which means I can switch up the contents of the baskets and the label without too much hassle.
For my pantry containers, I was really looking for something clean and semi-permanent, so vinyl labels seemed like the way to go.
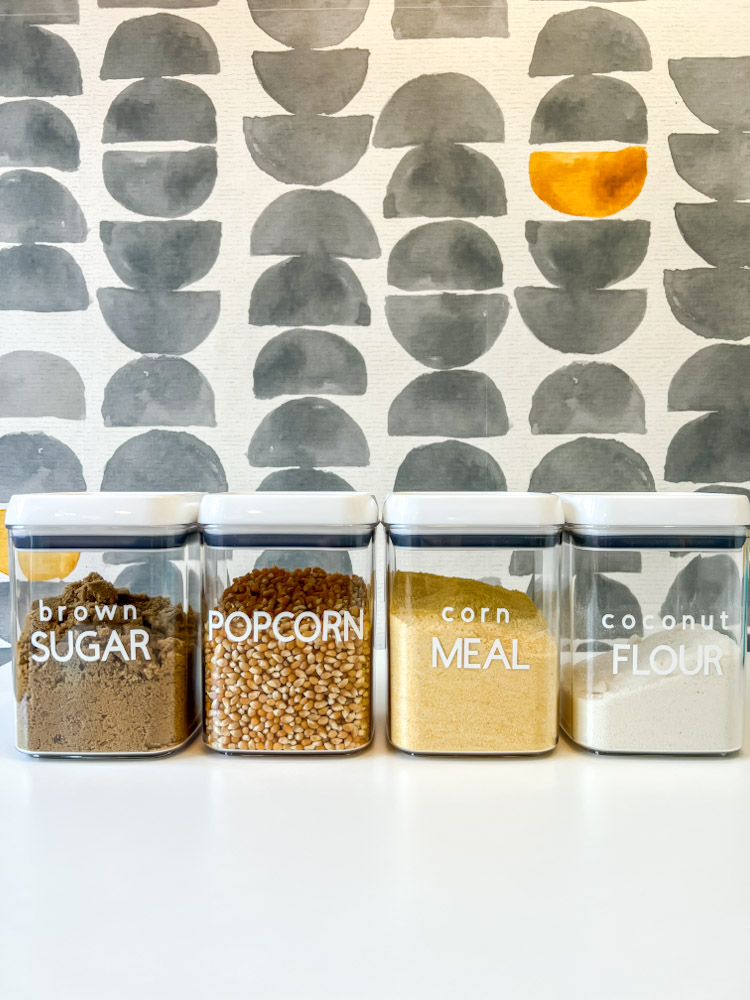
Click the link below to read the post on how to create vinyl pantry labels:
How To Make Vinyl Pantry Labels With A Cricut
Tip #8: Store appliances on the deep shelves
Deep pantries are wonderful because they can be used for more than just food. Do you have countertops that are cluttered with Instant Pots, Crock Pots, Air Fryers and more? Deep shelves in the pantry make for perfect storage areas for these bulky appliances.
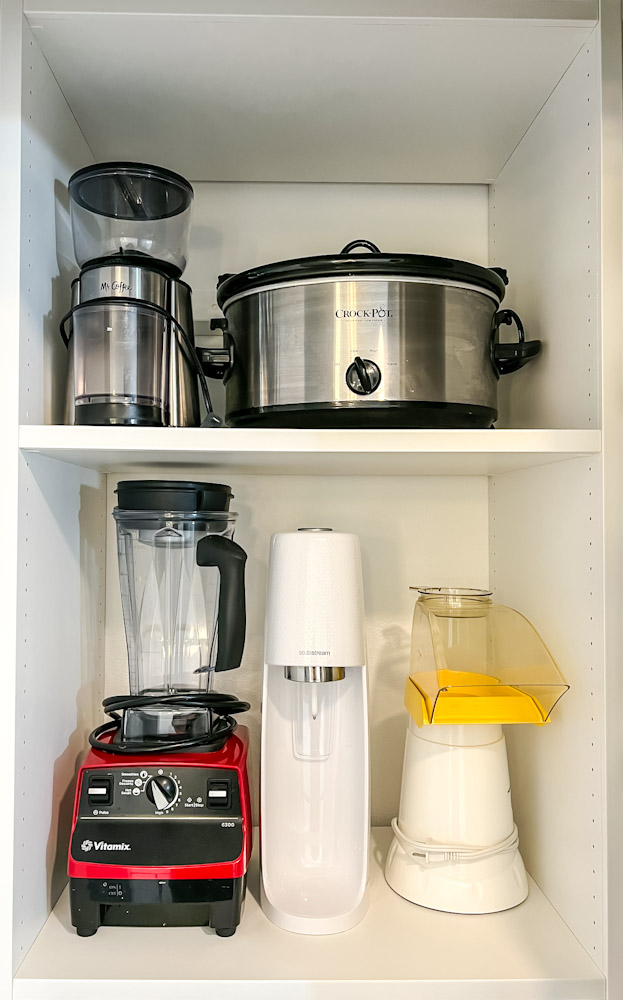
I use two shelves of my pantry for our crock pot, coffee grinder, Vitamix, air popper, and soda stream. I love not having all of these out on our counter all the time and it isn’t too much trouble to pull them out of the pantry when I need to use them.
Tip # 9: Add drawers
If you have the space, consider adding a set of pull out drawers. Drawers are great for organizing small things that you want to see all at once, such as tea, snack bars, seasoning packets, spices, plastic serving wear and more.
 Stand alone units can be be a great way to slide in more storage, especially in a deep pantry. The unit shown above is from IKEA and comes in at a nice price point compared to other drawer units on the market.
Tip #10: Consider turntables
Don’t forget that extra large turntables (like this 15″ wide one from Target or this 15″ wide wood one from IKEA) can be perfect for those deep, hard to reach shelves.
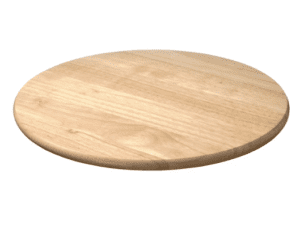
Turntables are the perfect solution for hard to reach corners or shelves that are up just out of reach. I’m especially a fan of turntables on wire shelving that is often seen in pantries, because it prevents things from tipping over between the wires.
Here are some things that work well on turntables:
- sauces, syrups, and spreads
- liquor or other beverages
- baking essentials
- canned goods
Alright, there you go. 10 tips that will help you organize your pantry, no matter how deep it actually is. The key to organizing this functional space is to be very intentional about the containers you use and the food items that you buy. Maximizing every square inch and adding labels for accountability will ensure that your space stays organized even after the space is “complete”.
Happy organizing!

Leave a Reply